

How To Change Time On Amano Mrx35
Hide thumbs Also Meet for MRX-35:
- Manual (five pages)
Also Run across for Amano MRX-35
Related Manuals for Amano MRX-35
Summary of Contents for Amano MRX-35
- Page 1 ® AMANO MRX-35 Electronic Calculating Time Recorder Setup and Operations Transmission...
-
Page 2: Proprietary Notice
140 Harrison Artery Roseland, New Jersey 07068 Amano Cincinnati, Inc. reserves the right to make equipment changes and improvements which may not exist reflected in this certificate. Portions of this document may have been updated to include the latest hardware or firmware versions. -
Page three: Table Of Contents
Time Rounding ..............3-10 Automated Break ..............3-12 Daily and Weekly Overtime ..........3-15 Imprint and Brandish Manner..........3-xviii Appointment Print Mode ..............iii-19 Stock-still Break ..............3-20 Overtime Type..............three-21 Card Data Clear ..............3-22 Data Initialization .............3-23 Advanced Programming ............3-26 Exception Zones..............3-26 Revision Zones..............iii-35 MRX-35... - Page 4 Ribbon Replacement .............. 4-2 Fuse Replacement ..............iv-iv Troubleshooting..............4-5 Error Codes ................iv-6 Parameter Error Codes ............4-7 Replacement Parts and Accessories........4-8 Default Programming Values..........4-9 Bones Programming ............4-9 Avant-garde Programming ..........4-10 Chapter v: Specifications ..........5-1 MRX-35...
-
Page five: Chapter 1: Overview
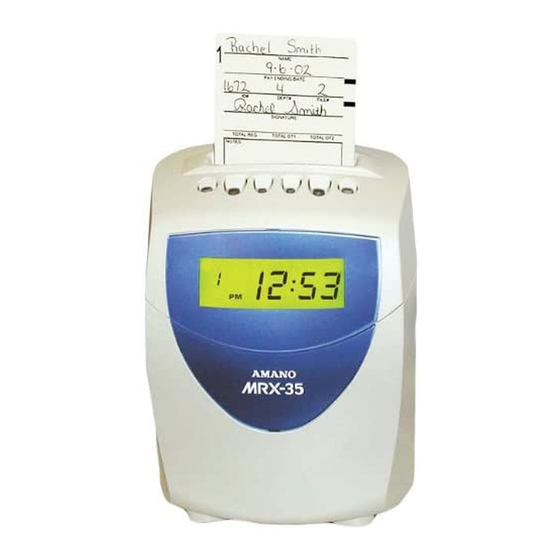
Operation Summary The MRX-35 is an avant-garde electronic time recorder that calculates daily and weekly employee hours based on user-defined options and operating parameters. The MRX-35 allows yous to ascertain the following parameters and user- divers options: • Rounding •... - Page half-dozen MRX-35. When the programmed pay period has ended, a new time card must be issued. When a new fourth dimension card is issued, the MRX-35 stores the data for the card under a new user number, therefore eliminating the demand for enrollments.
-
Page 7: External View
When a specific code number has to be Illuminated entered in programming mode, an illuminated Non Shown LED underneath a button displays the current setting. MRX-35... -
Page 8: The Lcd Display
Indicator mode. AM/PM indicator is displayed when the AM/PM hours imprint format is set to 12-hour format. In programming mode, this indicator is Date/Fourth dimension used to set a value, date, or time. Engagement Displays the engagement during normal functioning. MRX-35... -
Page 9: Normal Functioning
Normal Functioning During normal operation, the fourth dimension and date are displayed. Programming Fashion In the programming style, the display will appear as follows: Note: In the programming fashion, time is displayed in a 24-hr format. MRX-35... -
Page 10: Other Components
Other Components • (3) Basic Programming Cards • (3) Avant-garde Programming Cards MRX-35... -
Page eleven: Chapter 2: Getting Started
Affiliate ii: Getting Started Placement/Location When choosing a mounting location for your MRX-35, you should consider the following: • The mounting surface or hardware must be capable of supporting the unit'due south weight, 2.5 kg (5.5 lbs.) • The expanse must be within the specified operating temperature range: -10°C~45°C (14°F~113°F), 10%Rh~90% Rh. -
Page 12: Wall Mounting
Wall Mounting 1. Disconnect the power string from the power source, if applicable. 2. Ready the MRX-35 (brandish side downwards) on a flat surface. iii. Remove the rivet on the bottom of the unit, as shown beneath: 4. Identify two fingers every bit shown on the tabs (designated by arrows) and lift the back panel from the unit. - Page xiii 6. Using the back plate every bit a template, approximate the final location of the MRX-35, and mark the location of the teardrop-mounting hole on the wall. seven. Hang the back plate on a screw or anchor from the teardrop-mounting hole.
-
Page xiv: Power Connection
Power Connectedness Plug the power cord into a suitable grounded outlet. When the Air-conditioning ability is properly connected, the MRX-35 will cycle the impress machinery and display the currently programmed twenty-four hours of the week, appointment and time. MRX-35... -
Page fifteen: The Fourth dimension Bill of fare
The Time Carte The MRX-35 is designed for use with the following time carte: Item Function/Description Indicates the side of the fourth dimension menu being used. For Weekly Pay Periods, just Side ane will be Side Indicator used. Bi-Weekly Pay Periods use both sides (Week 1 on Side 1 and Calendar week 2 on Side ii). - Page 16 This total Daily Net may include Rounding, Breaks, or Revision Zones (if programmed). This number is used by the MRX-35 to shop Carte ID Number data from the time card. Barcode The Card ID Number in barcode format.
-
Page 17: How To Insert A Time Card
How to Insert a Time Card i. Brand sure that there is ability to the MRX-35. 2. Verify that you are using the correct side of the fourth dimension card for your Pay Period: Pay Menstruation Side Weekly Side one Bi-Weekly (If the Pay Period is... - Folio 18 MRX-35...
-
Page 19: Chapter 3: Programming
Chapter 3: Programming Introduction The MRX-35 must be programmed and configured earlier apply. Basic Programming consists of fourth dimension, date, imprint, and display formatting, as well as Pay Period, Time Rounding, Motorcar Breaks, Fixed Break, Overtime, Daylight Saving Time (DST), and Solar day Change Time adjustments. -
Folio 20: Basic Programming
A and advance it to the Date Setting position past pressing the Next push button once. 2. Press the buttons indicated past the programming card to configure the year, month, and date. Note: The year volition scroll chronologically forward from 2002 to 2050. MRX-35... -
Page 21: Pay Period Type And End Twenty-four hours
To configure the Pay Period Type and day that it volition cease on, perform the following: i. If you take non already done and so, insert MRX Basic Programming Card #ane Side A and advance it to the Pay Menses Type position by pressing the Next push button twice. MRX-35... - Page 22 Continue pressing the "Options" button until the number corresponding to the desired 24-hour interval appears. Code Lawmaking Mon Friday Tuesday Sat Wed Sunday Thursday * seven = Default 5. Press the End button to enter the value selected and the carte du jour volition exist ejected. MRX-35...
-
Page 23: Daylight Saving Fourth dimension
Daylight Saving Time The MRX-35 is shipped from the factory with the Daylight Saving Time (DST) feature enabled. However, it tin can exist disabled if so desired. The procedure for enabling/disabling DST is equally follows: one. Insert MRX Basic Programming Card #1... - Folio 24 You may besides press the Side by side button to accelerate through all settings until the card is ejected. If DST is enabled, the MRX-35 will automatically calculate the DST cease date from twelvemonth to year. If you wish to manually change this appointment, follow the procedure below.
-
Page 25: Twenty-four hours Change Time
The Mean solar day Alter Fourth dimension is the fourth dimension of day that a normal business 24-hour interval ends. It advances the virtual time used for time calculation from the electric current business twenty-four hours to the next or post-obit business twenty-four hour period. The MRX-35 is shipped with a default 24-hour interval Alter Time of one:00 AM. If you wish to... -
Page 26: Day Change Override
2 of that (previous) day. If the OUT dial exceeds the Day Change Override window, information technology volition be considered an IN punch for the following or adjacent day, and no adding will exist made for the previous solar day. Example 1: Example ii: MRX-35... - Page 27 3. Printing the Next button to enter your selection. The menu and the display will advance to the Rounding Unit of measurement position. You may besides press the Next push button to advance through all settings until the menu is ejected. MRX-35...
-
Folio 28: Time Rounding
The choices are: 1 Infinitesimal, 6 Minutes, fifteen Minutes (Default), or Adaptable (ane through sixty minutes). If you lot are using the Adaptable setting, press the button indicated until the desired value appears in the brandish. 3-x MRX-35... - Page 29 Adjustable setting, hold down the button indicated until the desired value appears in the brandish. Note: The Rounding Unit of measurement must be greater than the Rounding Point. 5. Printing the Cease push button to enter the value selected and eject the card. MRX-35 3-eleven...
-
Page 30: Automatic Interruption
Automatic Intermission Up to ii Automated Breaks tin be programmed in the MRX-35. Each break deduction is limited to a maximum of 4 hours. The amount of time set for each break is automatically deducted provided that the employee works the minimum number of hours to authorize for each interruption. - Page 31 The card and the brandish will accelerate to the Motorcar Break #2 position. You may also press the Next button to advance through all settings until the carte is ejected. v. The display for the Auto Break #2 position volition appear as follows: MRX-35 3-13...
- Page 32 7. Press the Next button to enter your selections. The card and the brandish will advance to the Daily OT (Overtime) position. You may also printing the Side by side button to advance through all settings until the carte du jour is ejected. 3-fourteen MRX-35...
-
Page 33: Daily And Weekly Overtime
If the Daily OT#1 is set to 7 and Daily OT#2 is set to x hours, and the employee works 11 hours, the employee will receive 3 hours in Daily OT#1 and 1 hour for Daily OT#two for that solar day. MRX-35 three-15... - Page 34 4. Press the Adjacent button to enter your selection. The carte du jour and the display volition advance to the Weekly OT (Overtime) position. You may also press the Side by side push to advance through all settings until the bill of fare is ejected. 3-16 MRX-35...
- Page 35 Note: For a Bi-Weekly Pay Menstruation, if the Overtime Blazon (MRX Basic Programming Card #3 Side A) is set to Bi-Weekly, the Weekly OT threshold levels will be doubled. 4. Press the Terminate push to enter your selections and eject the menu. MRX-35 3-17...
-
Page 36: Imprint And Display Manner
Banner and Display Mode The MRX-35 allows you lot to select the printing format of the hours on the time card. The hours setting also applies to the hours format in the LCD brandish. For hours, you can choose either 12-hour (AM/PM, default with PM hours underlined) or a 24-hour (military) format. -
Page 37: Engagement Print Manner
3. Printing the Adjacent button to enter your choice. The menu and the brandish volition accelerate to the Stock-still Break position. You may also press the Adjacent button to accelerate through all settings until the carte is ejected. MRX-35 3-19... -
Page 38: Fixed Break
Fixed Break position by pressing the Next push button twice. two. The display volition appear every bit follows: three. Press the buttons indicated by the programming card for the Start and Finish times (hours and minutes) of the interruption. 3-20 MRX-35... -
Page 39: Overtime Type
To select the Overtime Type, perform the following: 1. If you accept non already done so, insert MRX Basic Programming Carte du jour #3 Side and advance it to the Overtime Type position by pressing the Next button iii times. MRX-35 3-21... -
Page 40: Card Data Clear
Card Information Clear Since the MRX-35 stores time data by fourth dimension card number, it may be necessary to manually clear a particular card number and its respective time data from retentiveness. This feature is useful if the time carte du jour is no longer used or the time carte du jour (user) limit has been reached. -
Folio 41: Data Initialization
Data Initialization This selection is used to print out programmed settings or reset your MRX-35 programmed settings to their default values. To do either operation, perform the post-obit: 1. If you have not already done so, insert MRX Basic Programming Card #iii Side... - Folio 42 Day Modify Time ane:00 Day Change Override 12:59 Rounding Unit of measurement Rounding Indicate Motorcar Break #1 60 minutes/Deduction Auto Suspension #1 Hr/Deduction Daily OT #1/#ii Hours Weekly OT #1/#ii Hour/Infinitesimal Imprint Format Date Imprint Format Stock-still Break Start/End Time Overtime Type 3-24 MRX-35...
- Page 43 Revision 2 Punch Type Revision 2 Start/End Times Revision 3 Punch Type Revision 3 Start/End Times Revision iv Punch Blazon Revision four Start/Terminate Times Revision five Punch Type Revision v Start/End Times Revision 6 Punch Type Revision 6 Start/End Times MRX-35 3-25...
-
Folio 44: Advanced Programming
End Fourth dimension position. You may too press this push to advance through all settings until the card is ejected. If None was selected, the carte du jour and display will accelerate to the Exception 2, Punch Type position. 4. The display will appear every bit follows: 3-26 MRX-35... - Folio 45 2, Dial Type position by pressing the Adjacent push button twice. 2. Select the Dial Blazon for Exception 2 from the choices indicated by the programming card and the code in the display. They are: Code Punch Type None Both (IN and OUT) MRX-35 iii-27...
- Page 46 vi. Press the Finish button to enter the values selected and eject the card. To create Exception Zone iii, perform the following: one. Insert MRX Advanced Programming Carte du jour #iv Side B The card will stop at the Exception 3, Punch Type position three-28 MRX-35...
- Page 47 Exception four, Dial Blazon position. 4. The brandish will announced as follows: 5. Printing the buttons indicated by the programming bill of fare for the Start and Terminate times of the Exception. MRX-35 3-29...
- Page 48 4, Punch Blazon position by pressing the Side by side button twice. 2. Select the Dial Type for Exception 4 from the choices indicated by the programming menu and the code in the display. They are: Code Dial Type None Both (IN and OUT) iii-30 MRX-35...
- Page 49 6. Press the End button to enter the values selected and eject the carte du jour. To create Exception Zone 5, perform the following: 1. Insert MRX Advanced Programming Menu #6 Side A The card will cease at the Exception 5, Punch Type position MRX-35 3-31...
- Page fifty Exception six, Dial Blazon position. iv. The brandish will appear as follows: 5. Press the buttons indicated by the programming card for the Start and Terminate times of the Exception. three-32 MRX-35...
- Page 51 half dozen, Punch Blazon position by pressing the Adjacent button twice. 2. Select the Dial Type for Exception 6 from the choices indicated by the programming card and the code in the display. They are: Lawmaking Punch Blazon None Both (IN and OUT) MRX-35 3-33...
- Page 52 4. The display volition appear as follows: v. Press the buttons indicated past the programming menu for the Starting time and Stop times of the Exception. 6. Press the End button to enter the values selected and eject the card. 3-34 MRX-35...
-
Page 53: Revision Zones
A Revision Zone is a window of time in which the employee may punch in or out (not both), merely the MRX-35 will not begin or end calculation at the moment of punch. A punch time in a Revision Zone will be "revised"... - Page 54 Revision 2, Punch Blazon position. 4. The display volition appear as follows: 5. Press the buttons indicated by the programming menu for the Offset and Finish times (hours and minutes) of the Revision. 3-36 MRX-35...
- Folio 55 Revision 2, Punch Type position by pressing the Next push twice. ii. Select the Dial Type for Revision two from the choices indicated by the programming carte and the lawmaking in the display. They are: Lawmaking Dial Type None MRX-35 3-37...
- Page 56 The carte volition stop at the Revision 3, Punch Blazon position two. Select the Punch Type for Revision three from the choices indicated by the programming card and the code in the brandish. They are: Code Dial Blazon None 3-38 MRX-35...
- Page 57 6. Press the Next button to enter the values selected. The card and the brandish will accelerate to the Revision 4, Punch Type position. You may also printing the Next button to accelerate through all settings until the carte is ejected. MRX-35 three-39...
- Page 58 Revision iv, Start and Finish Fourth dimension position. Yous may also press the Next button to accelerate through all settings until the menu is ejected. If None is selected, the card volition be ejected. 4. The display volition appear equally follows: iii-40 MRX-35...
- Page 59 End Time position. You may too printing the Adjacent button to accelerate through all settings until the card is ejected. If None is selected, the bill of fare and display volition advance to the Revision 6, Dial Type position. 3. The display will announced every bit follows: MRX-35 iii-41...
- Folio 60 five. Press the Next button to enter the values selected. The card and the display will advance to the Revision 6, Punch Type position. You may also press the Adjacent button to advance through all settings until the bill of fare is ejected. iii-42 MRX-35...
- Folio 61 3. The brandish will appear equally follows: iv. Press the buttons indicated by the programming carte du jour for the Start and End times (hours and minutes) of the Revision. 5. Press the Terminate button to enter the values selected and eject the menu. MRX-35 3-43...
- Page 62 3-44 MRX-35...
-
Page 63: Affiliate iv: Maintenance And Troubleshooting
Superlative Cover Removal To remove the Height Comprehend, concord the MRX-35 with both easily, press your thumbs down in the area shown and push up until the Top Comprehend is off. If the cover is removed when the power is on, the word "OPEN" volition appear in the LCD brandish. -
Page 64: Ribbon Replacement
3. Flip the Brandish upwards as shown. Exist careful not to touch on the area shown. 4. Using two fingers, press the two white release tabs down and towards the case. While holding them, remove the ribbon. 5. Insert a new ribbon between the ribbon guide and the printer caput. MRX-35... - Page 65 7. Put the Meridian Cover dorsum on. eight. Plug the power cord back into the power source. The display will show current date and fourth dimension. 9. Check the ribbon installation past making a test impress. MRX-35...
-
Page 66: Fuse Replacement
five. Printing both of your hands flat against the sides of the front end cover. 6. Pivot the front cover towards yous and remove information technology from the unit. Ready face up on a flat surface. MRX-35... -
Page 67: Troubleshooting
Re-enter the Time Settings. Wrong Appointment Appointment Setting is wrong. Re-enter the Date Settings. Light Imprint Ribbon cartridge is worn. Replace ribbon cartridge. Ribbon cartridge is not in Misprinting Place information technology in right position. right place. Fault code Encounter Error Lawmaking Charts MRX-35... -
Page 68: Error Codes
The table below lists the possible Error Codes that may announced in the display and their causes. Figure 4-ane Mistake Code Message Error Code Clarification Possible Cause and Solution Internal error. Contact your local Amano E-00 EEPROM Mistake service dealer or representative. Wrong side of card inserted. Verify Pay Eastward-01 Card Error Flow and the correct side. -
Page 69: Parameter Error Codes
Error Code Description Possible Crusade and Solution Internal error. Contact your local Amano E-96 CPU Error service dealer or representative. E-98 Password Incorrect countersign entered. Parameter Error Codes The table below lists the possible Parameter Error Codes that may appear in the display when a parameter is incorrectly set up. -
Page 70: Replacement Parts And Accessories
Revision 6, Punch Blazon #6 Side B P-42 Revision 6, Get-go/Finish Fourth dimension Replacement Parts and Accessories The following replacement parts and accessories are bachelor for the MRX-35. Parts and accessories can be ordered through your local Amano dealer. Part Number Description EFS-200015 Fuse... -
Page 71: Default Programming Values
Imprint Mode 1: 12 Hour (AM/PM) 0: 1/60 's of a minute Time Banner Fashion one: 1/100 'south of a infinitesimal 0: Date Date Imprint Style 1: Day of the Week Password Input Information Initialization 44: Initialize 77: Print MRX-35... -
Page 72: Advanced Programming
00:00 – 23:59 Weekly OT1 00:00 – 49:59 Weekly OT2 00:00 – 49:59 Motorcar Break #1 00:00 – 23:59 Machine Break #1 Deduction 00:00 – 03:59 Machine Break #two 00:00 – 23:59 Automobile Break #2 Deduction 00:00 – 03:59 four-x MRX-35... -
Page 73: Chapter 5: Specifications
3 years during storage v years during performance Print Head: x,000,000 characters or more (~1,660,000 punches) Ribbon: 180,000 characters or more (more than 30,000 punches). Amano P/North CE-319250 Employee Capacity: 50, no registration required Time Menu: Proprietary Amano Time Menu MRX-35... - Folio 74 MRX-35...
- Page 76 ARX-100900 Copyright ©2004 Amano Cincinnati, Inc. Printed in U.S.A. 1/04/500...

Source: https://www.manualslib.com/manual/671882/Amano-Mrx-35.html
Posted by: claytoncomillonall73.blogspot.com
0 Response to "How To Change Time On Amano Mrx35"
Post a Comment